HOW TO MAKE A BUNNY BASKET

thesaltyyankee.com
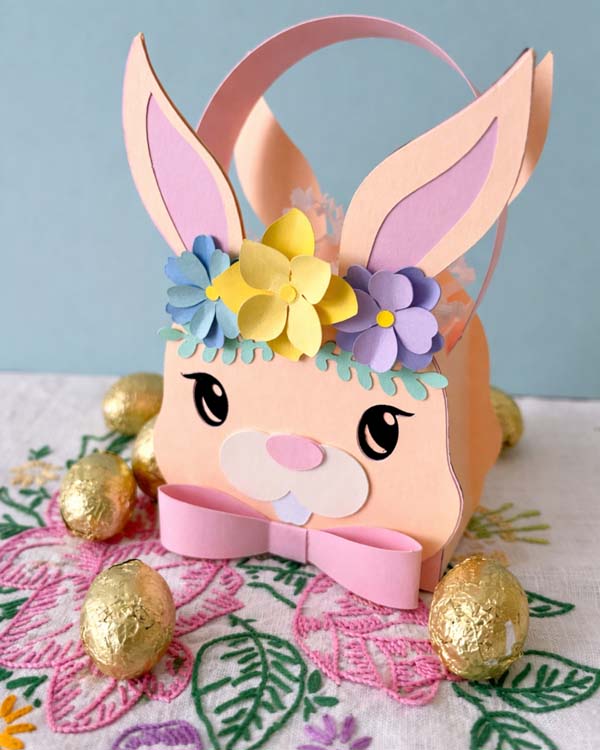
Easter has always been my favorite holiday. This Bunny Basket is inspired by all of the things I love about spring time - the colors, the candy, and the world teeming with new growth. Feel free to use the bunny on its own as a decor piece or the entire template to make a gift box that can be displayed after using. I'll show you below how to make one!
Supplies:
- Astrodesigns® Pastel Cardstock Starter Pack
- Your favorite glue
- Bunny Basket Template
- A cutting machine
- A curling tool of your choice (you can use a pen or marker, I use a scoring pen)
- Tweezers (optional, for handling small pieces)
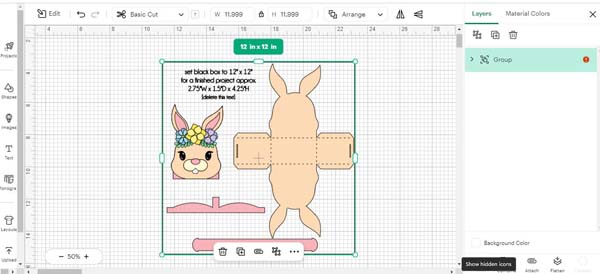
Step 1: Upload the SVG file into your cutting machine's design software.
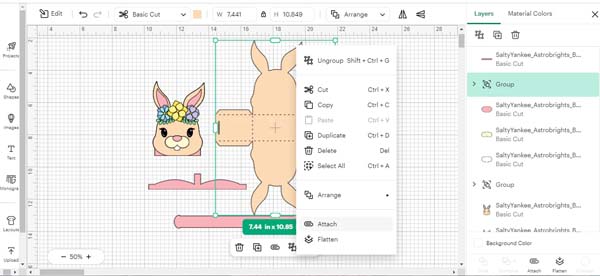
Step 2: Attach dashed lines to the box if using a cutting machine. To do this, right click the box piece and click "Attach".
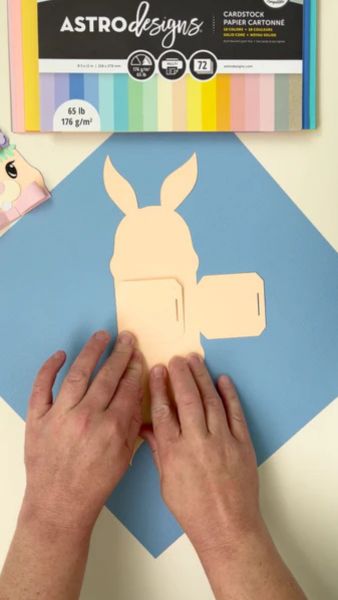
Step 3: Cut the design into your Astrodesigns® Pastel cardstock.
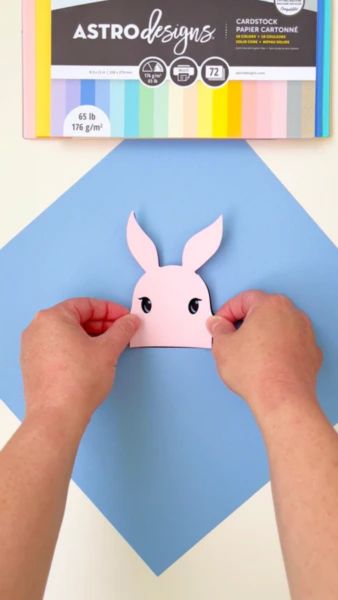
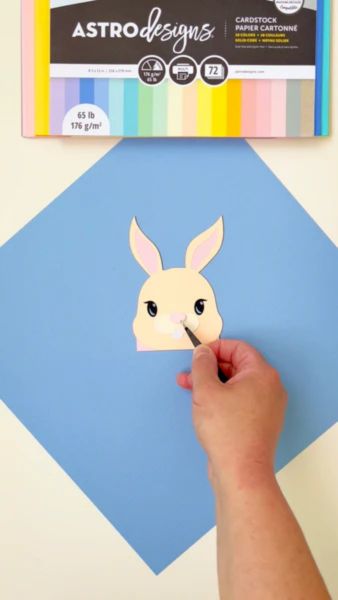
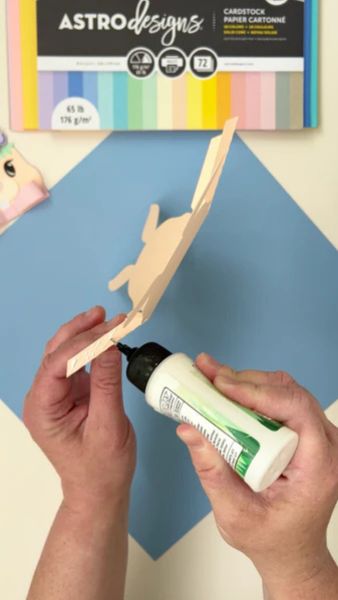
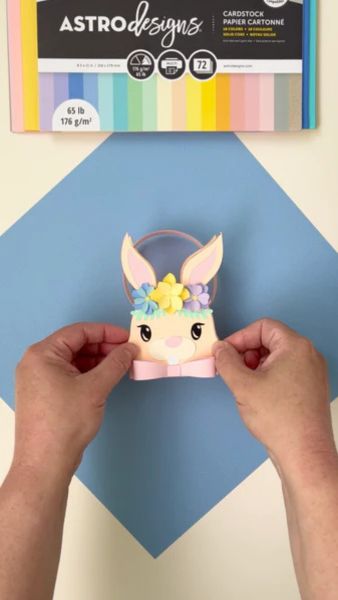
Step 4: Assemble the bunny's head and glue - be sure to line up the ears and eyes.
Step 5: Assemble the bunny's snout and glue.
Step 6: After gluing down the greenery of the crown, begin curling each of the petals. I am using a treat stick, but you can use any tool or stick you have handy. Curl each petal to create dimension.
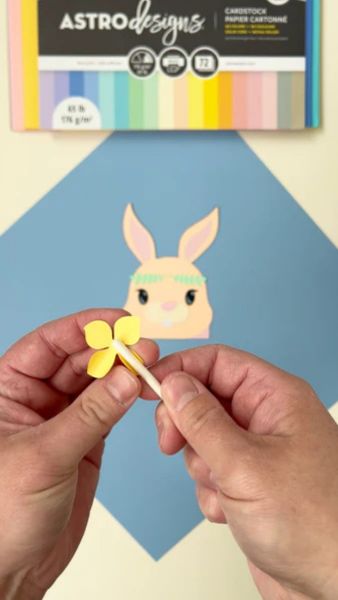
Step 7: Assemble each flower by placing the smaller petals on top of the larger ones. Glue in the center only. Be sure to offset the petals on top for a fuller look.
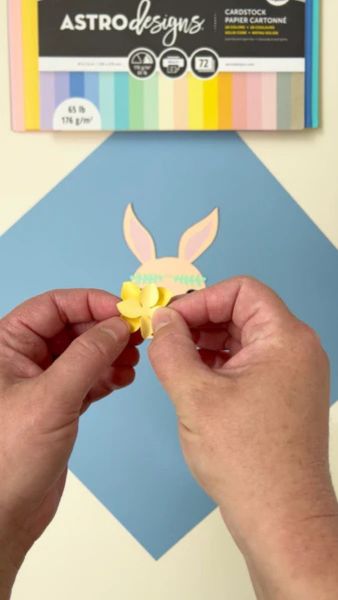
Step 8: Add the 3 flowers to the crown and glue down. Add the flower centers.

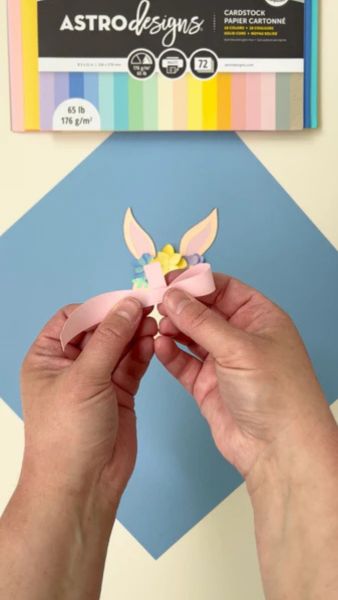
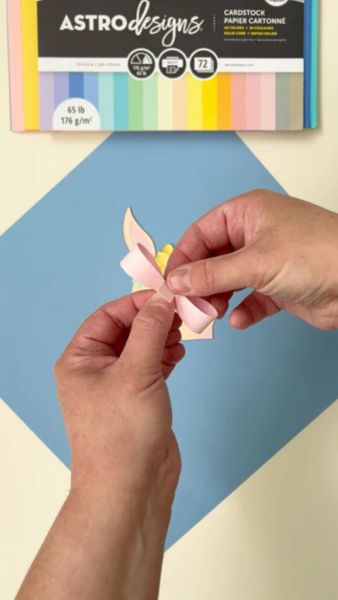
Step 9: Curl the 2 sides of the 3D bow. Add glue to the center and curl each side into the center to create the bow shape. Then, fold down the center to complete the bow.
Step 10: On the box piece, fold on all dotted lines.
Step 11: Add glue to one tab and fold up against the bunny shaped side to start the box shape.

Step 12: Repeat for the other 3 tabs to complete the box shape.
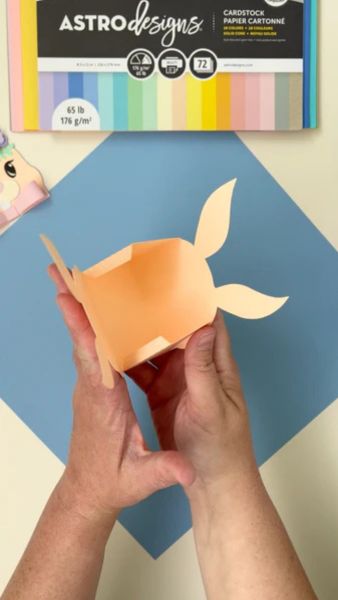
Step 13: Curl the optional handle and insert into the two side slots.
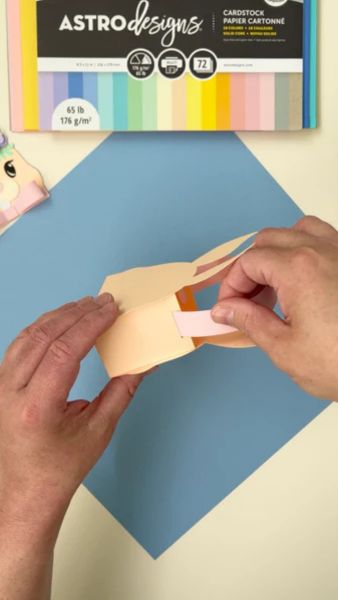
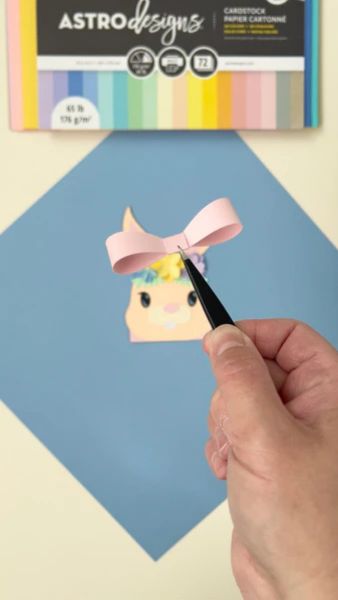
Step 14: Add your bunny face to the box - be sure to line up the ears.
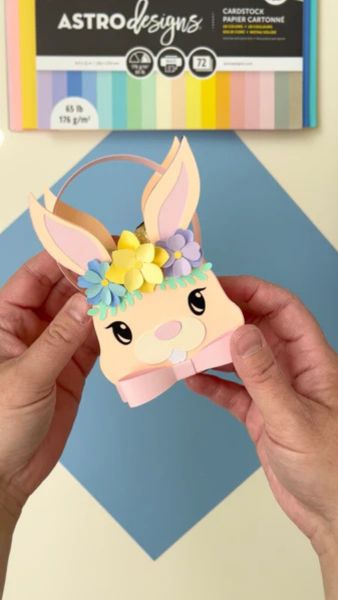
Step 15: Add your filler and treats of choice, and you're all done!
Thanks for creating with me! Happy Easter, happy spring, and happy crafting!