DIY HEART PAPER FLOWER BOUQUET

HIPSTERARTTEACHER.COM
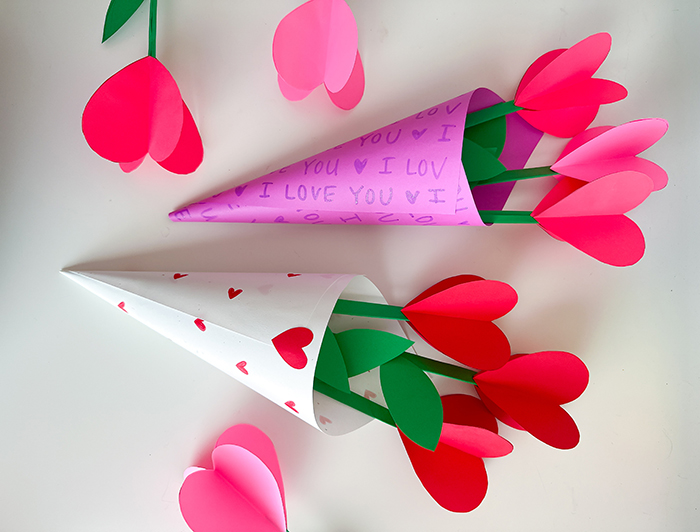
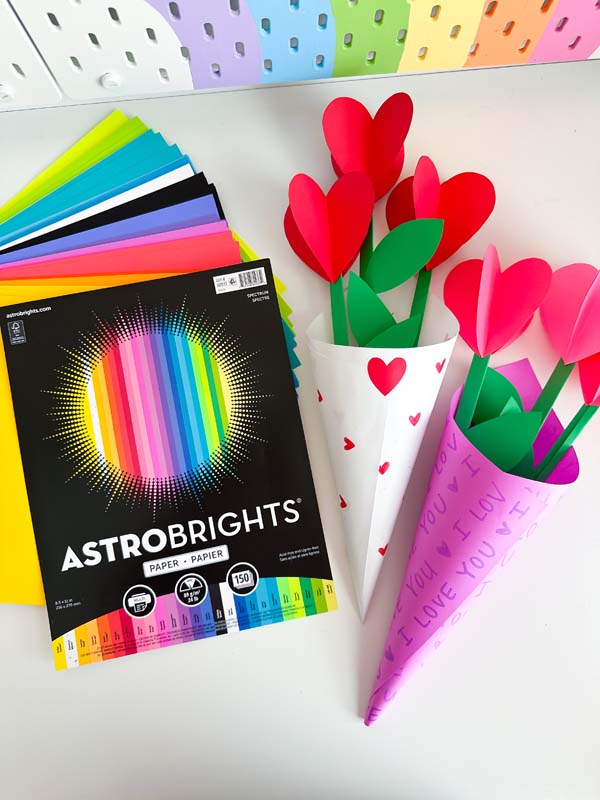
With Valentine’s Day right around the corner, it’s time to break out all of the paper crafts that make your heart melt! This hearts paper flower bouquet is perfect to try with kids at home or in the classroom for an easy DIY gift or arts and crafts project. With the variety of colors in the Astrobrights Spectrum Paper Pack, students can mix and match different colors to make a bouquet truly their own.
Materials:
- Astrobrights® Spectrum Paper Pack
- Free Template
- Scissors
- Glue stick
- Pencil
- Double-sided tape
- Markers
How to Make a DIY Heart Paper Flower Bouquet
Flower Instructions:
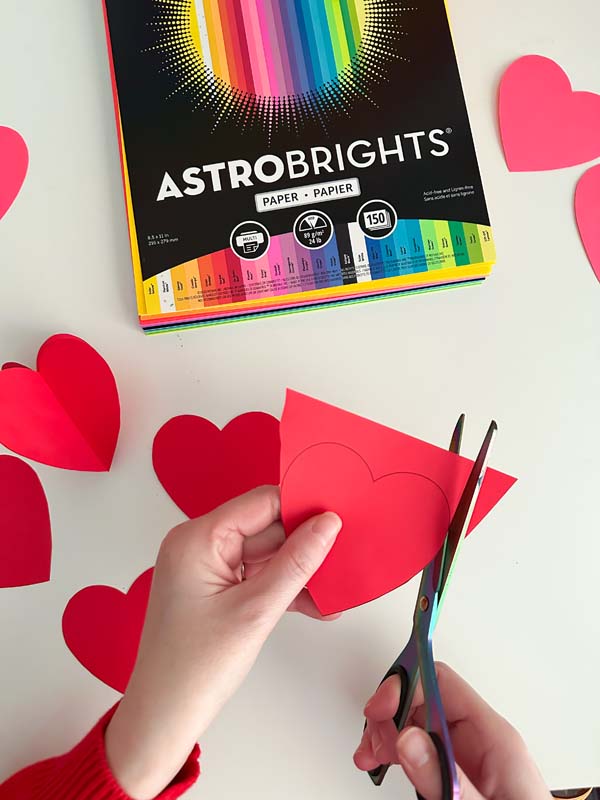
- Print the template onto Astrobrights Paper.
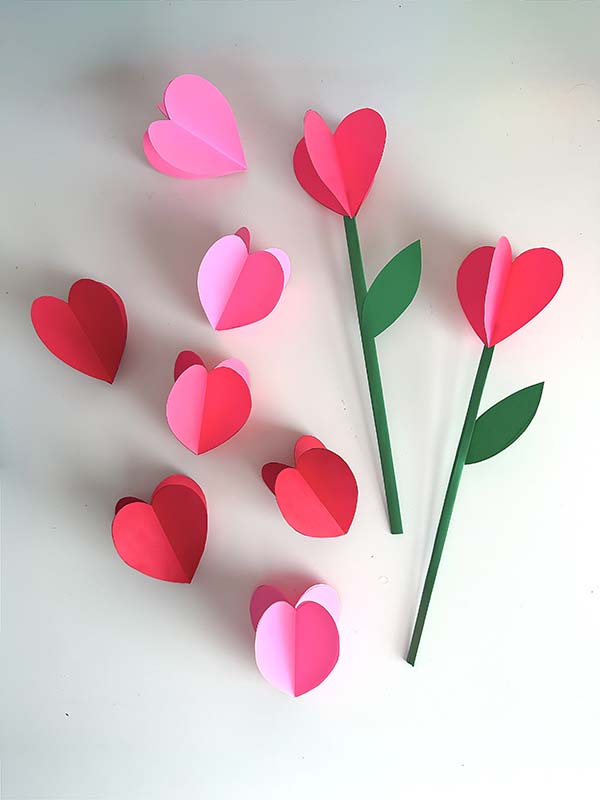
- Cut out the heart shapes and fold each in half. Use 4 hearts per flower.
- Glue the hearts together to form one flower.
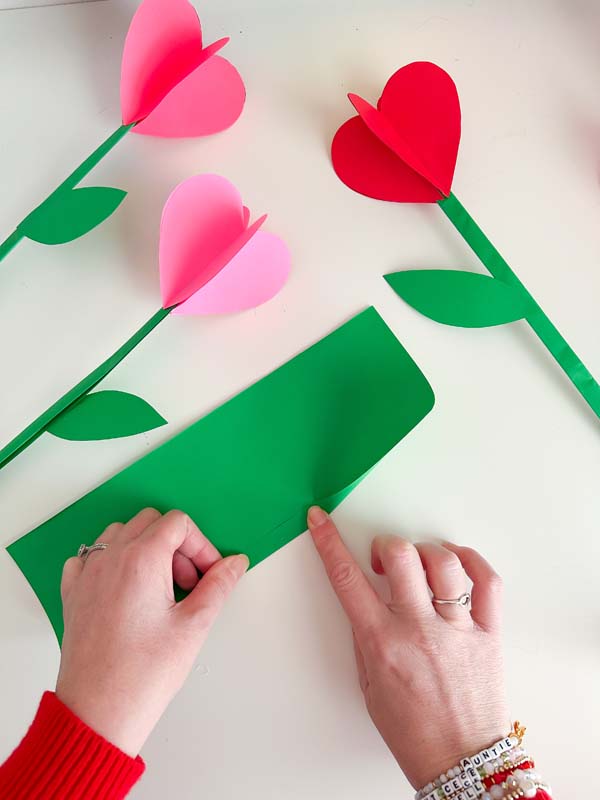
- Cut a sheet of Gamma Green™ or Terra Green™ paper in half. Fold it into thin strips to create a stem, gluing as you go to secure it.
- Gently open the bottom of the flower, insert the stem, and glue to fully secure.
- Cut out a leaf and glue it to the stem. Repeat to make as many flowers as you’d like and mix in other colors, if desired.
Bouquet Wrapping Instructions:
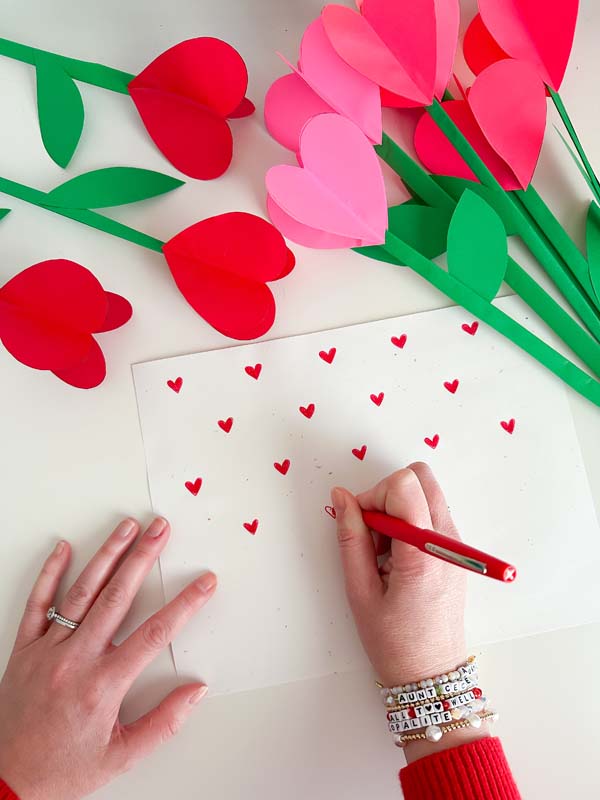
- Choose one sheet of paper and decorate it with markers. I chose a red hearts pattern for one and then an ‘I love you’ pattern for the other, but you can get as creative as you want!
- Gather one corner to form a cone, making sure that the bottom is closed.
- Secure the cone with double-sided tape.
- Add your flowers and arrange them. Optionally, you can trim the stems to create different heights.
Happy Valentine’s Day!