Gorgeous DIY Pastel Floral Spring Bouquet


There may be a snowstorm on the forecast for us this week but that doesn't mean I'm going to take my sights off spring! Pastels and tiny bunnies, Easter eggs and all the flowers, I'm SO ready for it! And while Mother Nature might not be on board with my wishes, I've decided to make a little bit of spring in my craft room using paper and create a spring floral bouquet!
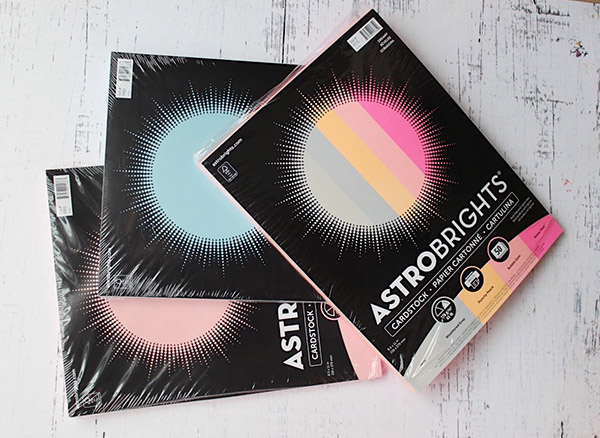
If you have never tried your hand at making paper flowers before, get excited! It's the most fun! You're sure to be pleasantly surprised by the gorgeous blooms you can create by being creative with the way you assemble and fold them. Plus, the color combinations make all the difference which is why we used ASTROBRIGHTS new Dreamy Paper Pack to make a bouquet in a palette that is definitely dreamy. Here is what you need:
Supplies Needed to make a Spring Floral Bouquet:
ASTROBRIGHTS "Dreamy" assorted cardstock
ASTROBRIGHTS blue cardstock
ASTROBRIGHTS pink cardstock
Craft cutter or scissors
Wired wood sticks
Pencil
Hot glue gun and glue sticks
Flower patterns: Hydrangea Flower, Daffodil, Branches, Flower with Stamens, Spring Flower
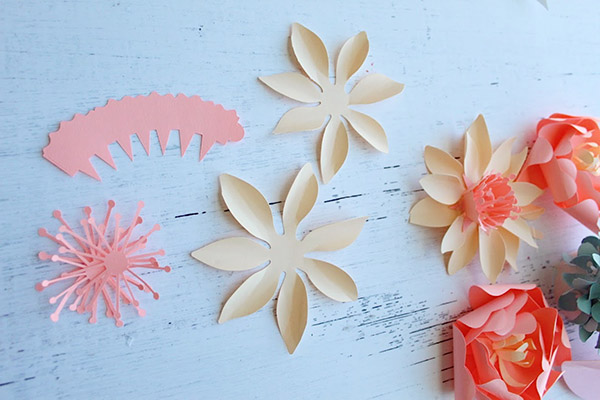
Step 1. Download your flower patterns into your cutting machine software, load your ASTROBRIGHTSs paper into your cutting machine and cut out your flower pieces using a craft cutter. If you do not have a craft cutter, you can save the patterns as a PDF, print them onto your ASTROBRIGHTS paper, then cut with scissors.

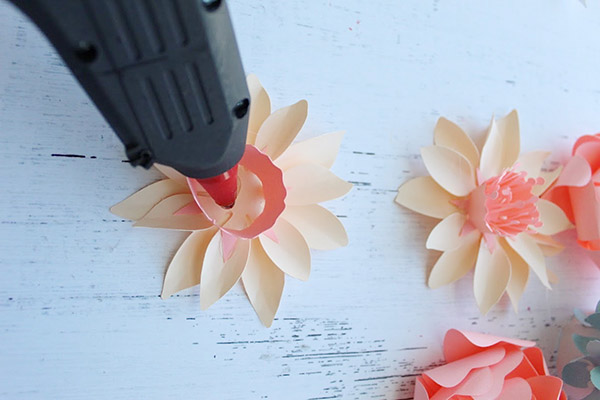
Step 2. Roll the leaves and petals around a pencil to create dimension.

Step 3. Assemble your flowers by stacking the outer petal pieces and securing each with hot glue, followed by the center pieces and securing each with hot glue.
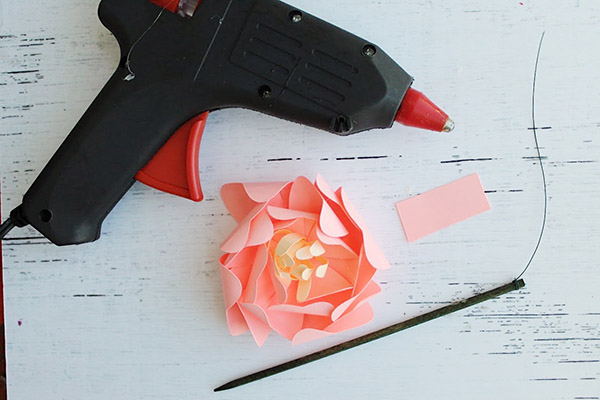
Step 4. Attach the wired wood sticks to your assembled flowers. Cut a 1-inch piece of paper and set aside. Put a generous amount of hot glue on the bottom of the flower and press the wire on the wood stick into the glue. While the glue is still hot, place the 1-inch piece of paper over the wire and into the glue to help secure the wired wood stick to the flower.

Step 5. Combine all of the flowers (now on their wired wood sticks) and wrap a ribbon or string around them to keep them in a bunch, or place in a vase to enjoy.
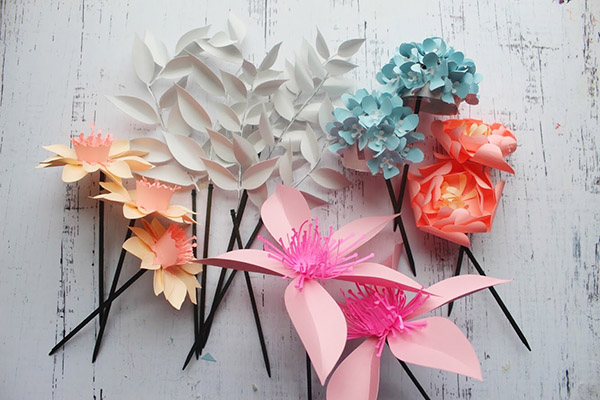
That's it! Now you have the most beautiful bundle of flowers with no watering required! We are so in love with the color palette of this bouquet, created by the gorgeous shades of paper in the ASTROBRIGHTS "Dreamy" cardstock pack, and can't get enough of these flowers that are so undeniably spring!
What spring projects are you excited to make with ASTROBRIGHTS paper now that the season is (hopefully) on its way! We'd love to hear all about them!
Happy making!
-Liz