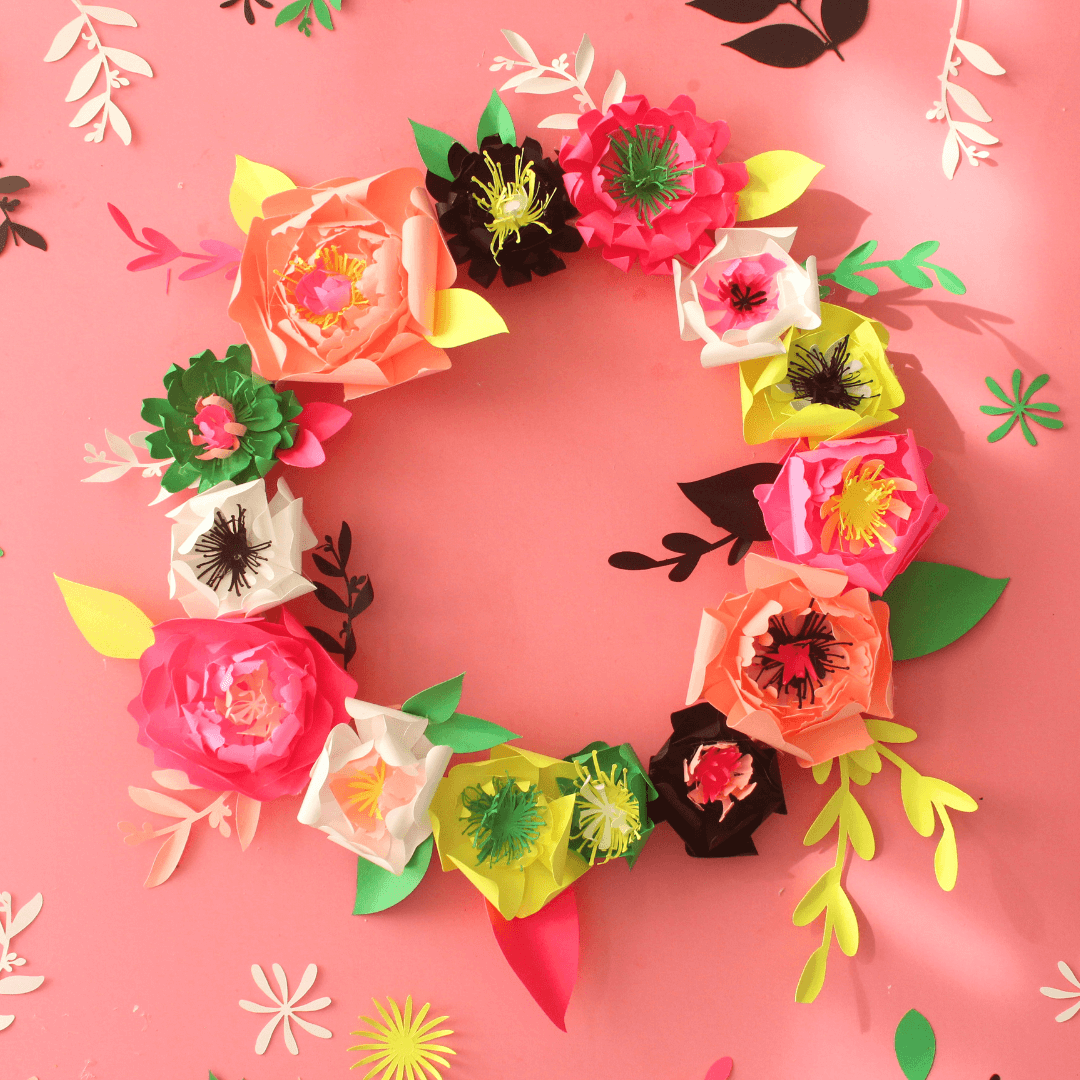
DIY Spring Wreath


Spring is on its way, and even if Mother Nature hasn’t gotten that memo where you live, you can make your own flowers from paper! Keep reading to get all the info you need to make your own gorgeous spring wreath–no planting required!
How to Make a Flower Wreath with Paper?
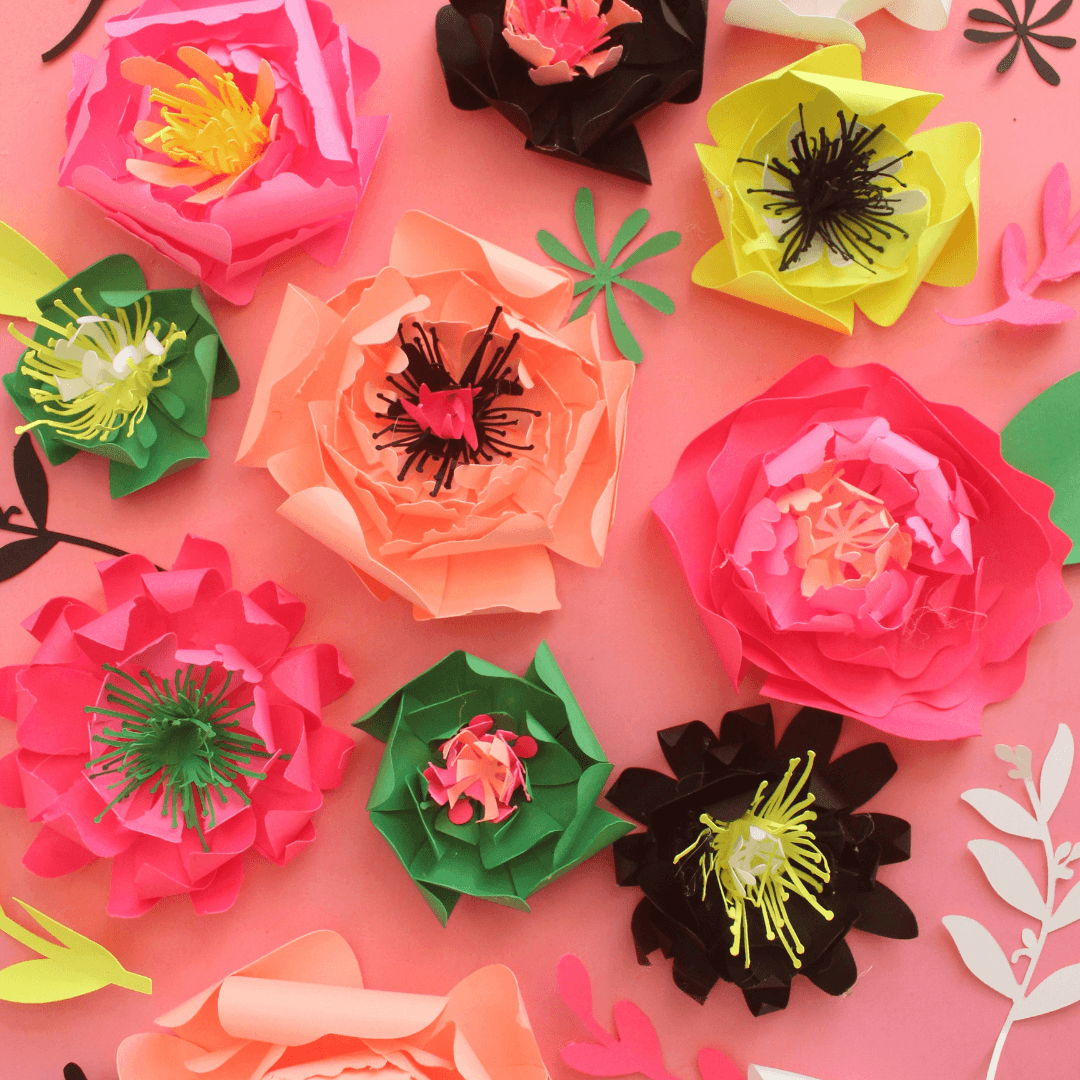
Making flowers with paper is a favorite craft of ours because there are endless possibilities for color combinations, textures, and types of flowers. For this spring wreath we used Astrobrights® Color Cardstock because the colors are gorgeous, and the cardstock holds up perfectly to all of the folding and handling that comes with making flowers. (See our other projects using Astrobrights® Cardstock here.)
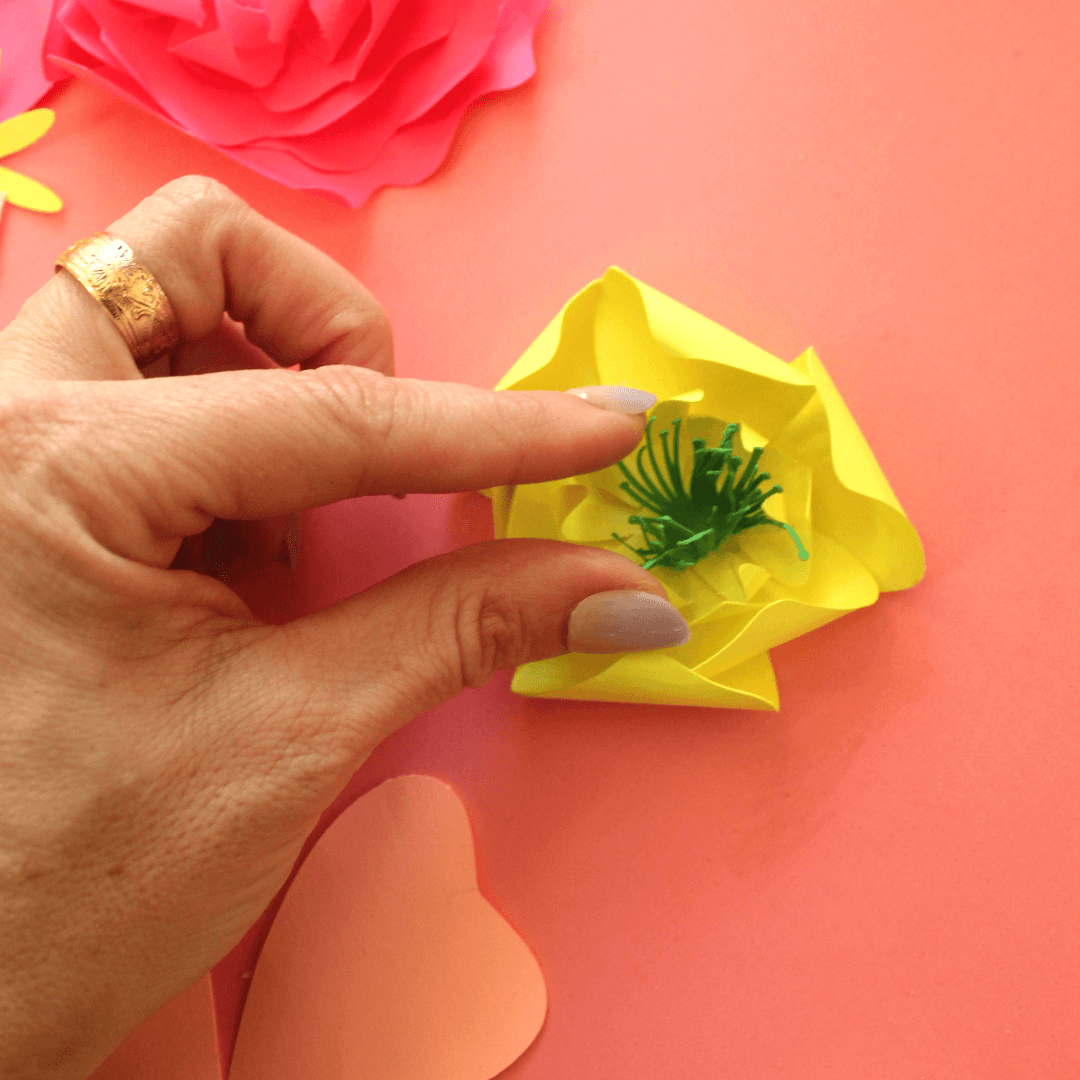
Aside from quality cardstock you’ll need a craft cutter for this project, or you can use scissors and look for layered flower patterns online. The key to success with making paper flowers is cutting several layers that build upon each other to look realistic so a craft cutter can be helpful!
What Kind of Foliage Do You Use for a Spring Wreath?
Often when we think of spring we think of tulips and daffodils which are a sure sign that the season is here. (We made a paper flower bouquet that included daffodils here and the result was lovely!) However, don’t let yourself feel boxed in by a particular kind of foliage or even a color scheme–if you like it, go with it! For our wreath we included pops of black that, in theory, doesn’t seem springy. But when paired with the right contrasting colors the result is bright and vibrant.
Honestly, any kind of flower will be beautiful, but don’t forget to add lots of leaves and branches to your wreath to help it feel livelier.

Supplies Needed to Make a Spring Wreath with Paper
- Astrobrights® Color Cardstock, Spectrum Assortment
- Cutting Machine (We used a Silhouette Cameo)
- Flower Cut Files (We used Wisteria Branches, 3D Flower with Stamens, 3D Spring Flower, Flower with Leaves)
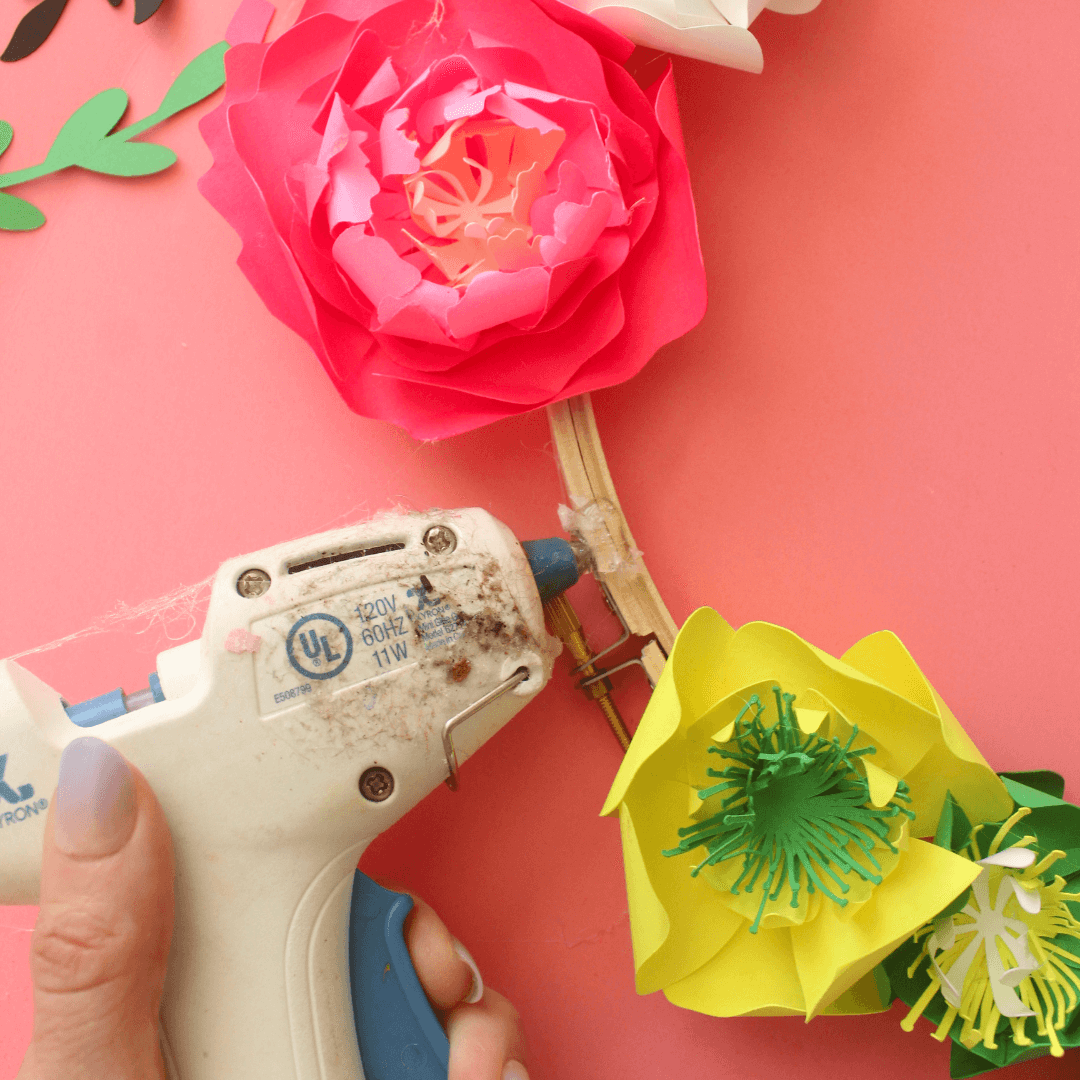
- Hot Glue Gun
- Embroidery Hoop
- Pencil
How to Make a Spring Wreath with Paper
Step 1: Using your desired craft cutter, cut out your designs on Astrobrights Cardstock. We used Solar White™, Pulsar Pink™, Plasma Pink™, Fireball Fuchsia™, Gamma Green™, Vulcan Green™, and Eclipse Black™.
Step 2: Weed your design and remove from cutting mat.
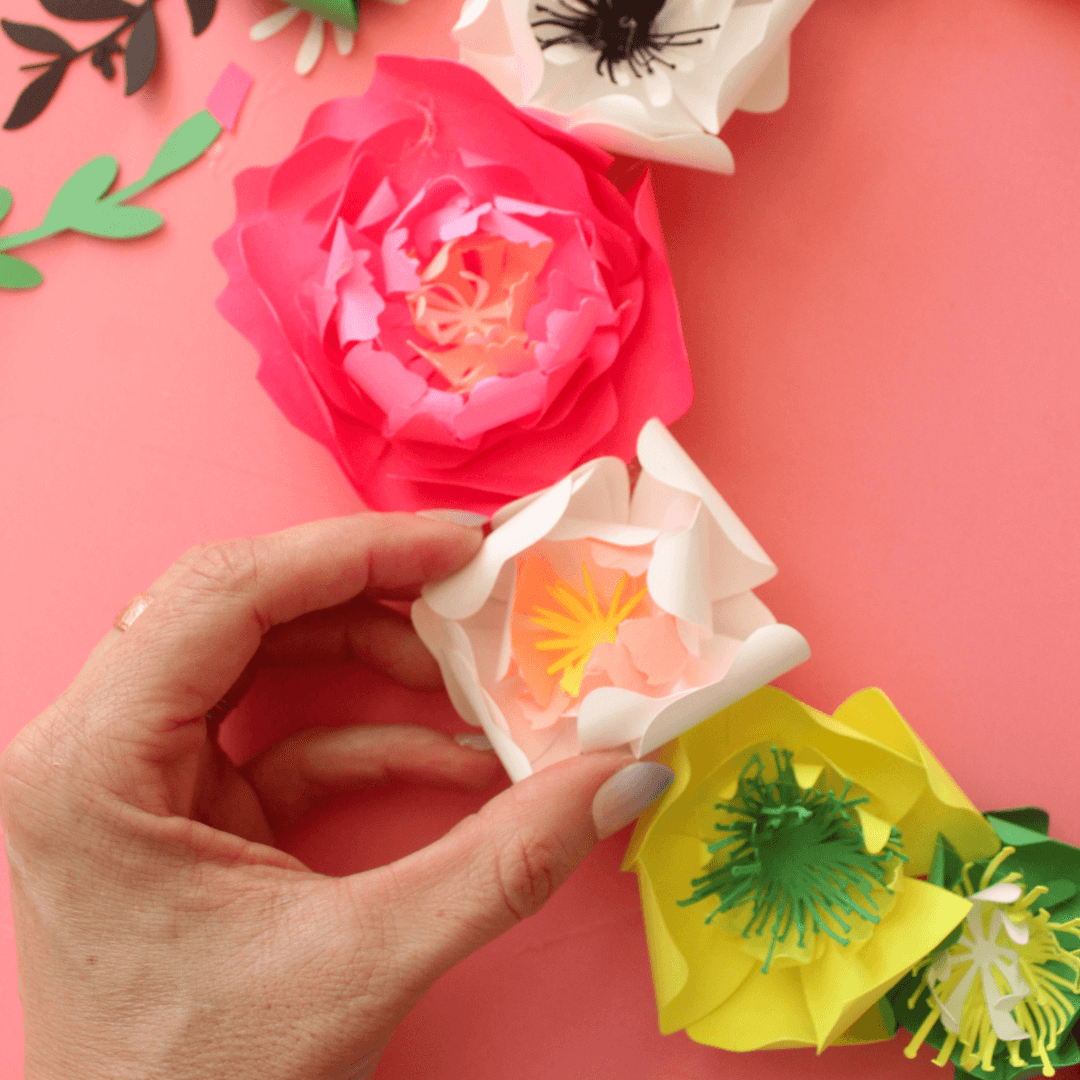
Step 3: Roll the leaves and petals around a pencil or paint brush to create dimension.

Step 4: Assemble all the flowers together by layering them on top of one another and attaching with hot glue.
Step 5: Attach flowers, leaves and branches to an embroidery hoop or wreath form using a generous amount of hot glue.
Step 9: Hang and enjoy!