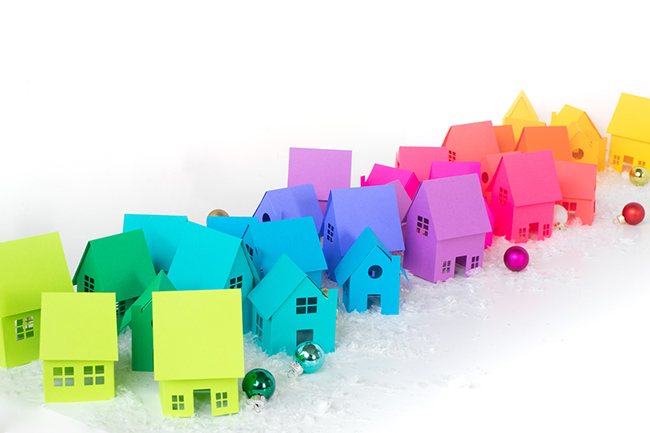
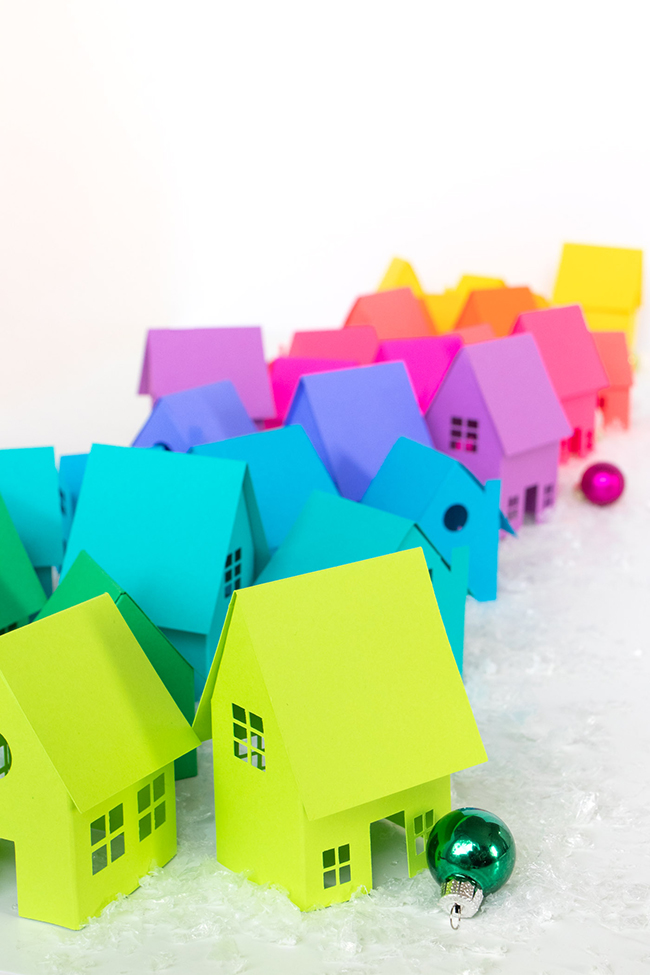
Rainbow Holiday Village
.ashx?h=70&w=72&la=en&hash=C1C7454FA0118268BB564765DF2236FD3F2B824C)
BY HOLLY WADE
Club Crafted
We're deep into the holiday season, and in case you need more inspiration to deck the halls, this vibrant rainbow holiday village is the perfect table centerpiece or shelf decor! Thanks to the bright array of ASTROBRIGHTS Papers colors, you can create a vibrant rainbow of houses to make this paper holiday village. With THREE styles of houses in my free holiday village template, you can make different colors and sizes of houses to customize your village for the season. Add some fake snow, mini bottle brush trees or even LED tea lights inside each house to make your display extra magical.
You can make your own rainbow holiday village very easily with a cutting machine OR with a little more elbow grease using a craft knife. Don't worry if you don't have any special tools! The vibrant colors will be the real stars of the show.
Using the "Spectrum" cardstock pack, I selected these colors for my rainbow holiday village:
- Solar Yellow™
- Galaxy Gold™
- Orbit Orange™
- Rocket Red™
- Plasma Pink™
- Fireball Fuchsia ™
- Planetary Purple™
- Venus Violet™
- Celestial Blue®
- Terrestrial Teal™
- Gamma Green™
- Terra Green™
Watch the video below to see the how-to in action!
Supplies:
- Free holiday village templates (SVG / PDF)
- Craft knife OR cutting machine with grip mats
- Scissors
- Scoring board
- Glue stick
How to Make a Rainbow Paper Village without a Cutting Machine

Step 1: Print out the PDF version of the holiday village template. There are three variations. Use scissors and/or a craft knife to cut out the template, including the small windows.
Step 2: Use the template to cut out the same shapes from each piece of Astrobrights cardstock. You can cut two houses and roofs one from piece of paper. Repeat in each on your desired colors with the various house styles to begin creating your rainbow holiday village.
Step 3: To make the folds more easily, use a scoring board and tool to draw fold lines at each section of the houses. You will fold along each flap and roof lines to make the 3D houses. Then fold down the center of the square roof pieces.
Step 4: Lastly, use a glue stick to apply glue on the "flaps" of the houses. Glue together the house base and roof to the flaps. Set aside to dry and repeat.
How to Make a Paper Village with a Cutting Machine
Step 1: Upload the above SVG file for the rainbow holiday village to a cutting machine design software. Assign each a color if desired to cut on separate mats. Select each house shape, and choose "Attach."
Step 2: Load your Astrobrights cardstock on a grip mat into your cutting machine. Choose the cardstock option. Press "Cut."
Optional: In the design software, you can add scoring lines if desired.
Step 3: Unload the mat and remove the house shape and roof. Use a scoring board and tool to draw fold lines at each section of the houses. You will fold along each flap and roof lines to make the 3D houses. Then fold down the center of the square roof pieces.
Step 4: Lastly, use a glue stick to apply glue on the "flaps" of the houses. Glue together the house base and roof to the flaps. Set aside to dry and repeat.
Arrange your rainbow holiday village on a table, shelf or even your mantel! I loved seeing how the colors pop on this all-white table with a little fake snow. How else would you decorate for the season with ASTROBRIGHTS Papers?
P.S. did you see the greenery garland I created using Astrobrights Gamma Green cardstock!? Add red pom poms to make it look festive for the holidays!
