Spring Inspired DIY Beaded Jewelry (Printable Template)

.ashx?la=en)
Merriment Design
I seek out signs of spring. I’m constantly scanning the ground looking for little peeks of green popping up that signal early spring flowers are on their way. After months of Chicago snow and chapped skin and boots and hats, early spring flowers like daffodils, hyacinths, violets, tulips, and azaleas really make me happy. Early spring flowers mean that warm weather’s not much longer now. We made it!
Today I’m sharing my paper bead jewelry DIY project that celebrates spring. I designed four pieces of brightly colored paper bead jewelry inspired by my favorite spring flowers and ASTROBRIGHTS® Paper.
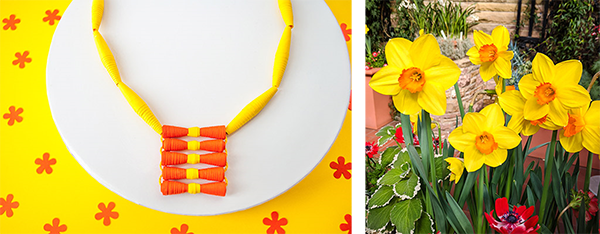
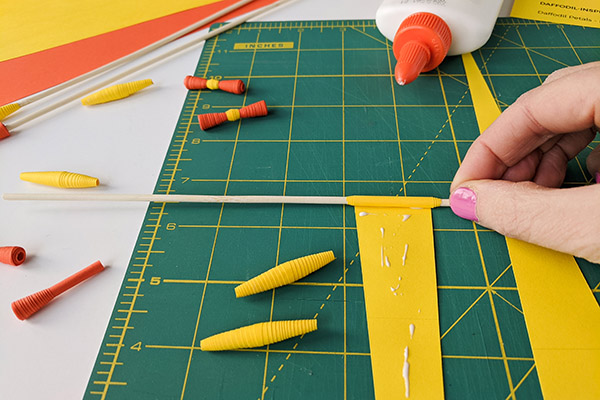
First, I designed a cheery daffodil necklace with long Sunburst Yellow™ paper bead ‘petals’ and an Orbit Orange™ cup center:
DAFFODIL NECKLACE
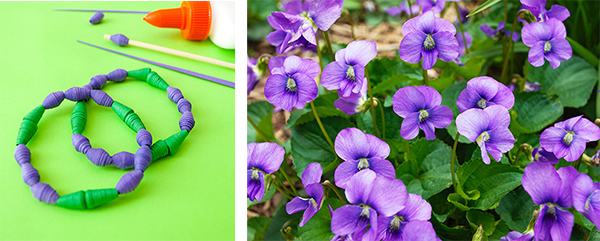
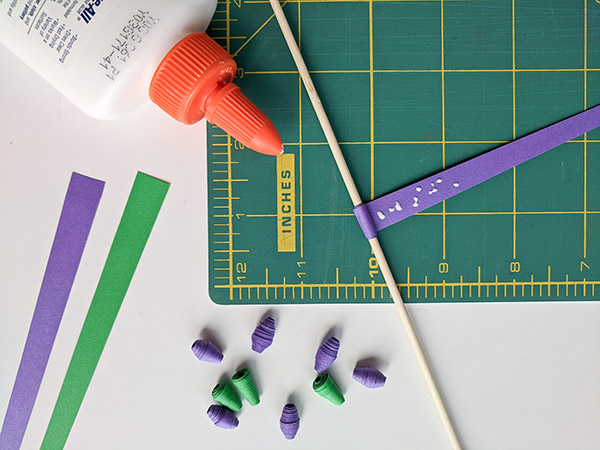
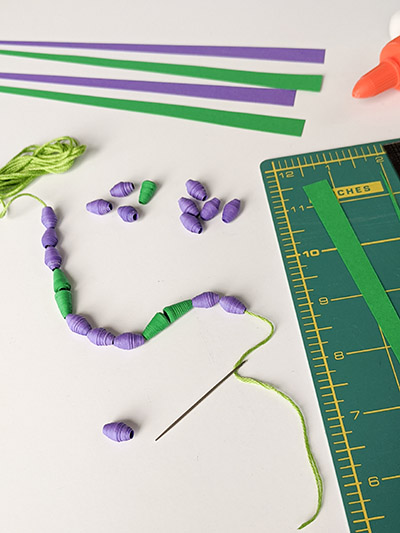
Then I designed delicate hyacinth bracelets with deep purples and splashes of green. My paper bead hyacinths come in bunches: three stacked Gravity Grape™ flowers with one Gamma Green™ stem for each hyacinth stack. You could also choose to add a little Planetary Purple™ or Venus Violet™.
HYACINTH BRACELET
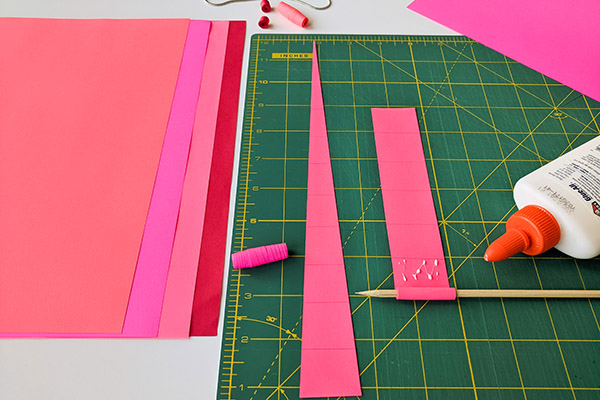
Tulips are one of my top favorite flowers across all seasons. Tulips are large and showy, so I made a pink and red chunky necklace inspired using Fireball Fuchsia™, Plasma Pink™, Rocket Red™, and Re-Entry Red™.
TULIP NECKLACE
Lastly, I designed a pair of vibrant earrings inspired by yellow tulips and pink azalea shrubs using Sunburst Yellow™, Fireball Fuchsia™, and Plasma Pink™. I slipped teeny paper beads onto my silver hoop earrings and it was so easy that I’ll be mix-and-matching paper bead colors on my earrings all spring.
AZALEA EARRINGS
You can easily create your own spring flower DIY paper bead jewelry in a few easy steps with ASTROBRIGHTS® Paper. Just download my free paper bead printable template below, print onto your chosen bright colors, cut, roll, glue and slip the gift card inside. String the paper beads onto embroidery floss or elastic thread to make paper bead necklaces and bracelets inspired by spring.
++++
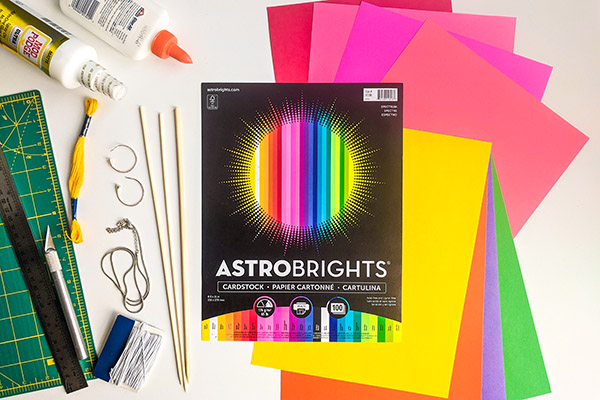
Supplies for making DIY paper beads for necklaces, bracelets, and earrings:
- Kathy’s free DIY paper bead template PDF download
- ASTROBRIGHTS Papers in your chosen colors (Pictured: SPECTRUM CARDSTOCK)
- Paper scissors and optional craft knife, metal ruler and self-healing mat
- Wooden skewers
- School glue, or decoupage glue and a paintbrush
- Silver chains or embroidery thread and needle for necklaces, elastic thread for bracelets, hoops for earrings
- Optional spray sealant for extra protection
++++
Step 1: Choose colors for your DIY paper beads and gather supplies
Pick your assorted Astrobrights® Papers. I chose colors inspired by my favorite early spring flowers -- cheery daffodils, delicate hyacinths, large and showy tulips, and bright azaleas -- but you can choose any bright color palette that you like.
Step 2: Print and cut out the DIY paper bead free printable templates
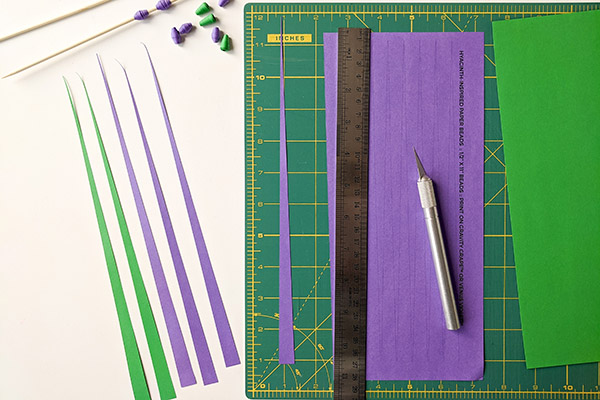
Download my DIY paper bead free printable templates. Print template onto ASTROBRIGHTS Papers and cut out. Print the full size of the paper; do not shrink to fit. Cut out the bead shapes using paper scissors or a craft knife, clear ruler, and self-healing mat. Do not cut the light gray guidelines; these guidelines will help you roll straight beads in the next step.
For each delicate hyacinth bracelet:
- Cut nine round beads for flowers
- Cut six cone beads for stems
For the cheery daffodil necklace:
- Cut six triangles for the petals
- Cut five pieces for the daffodil cup (corona)
- Cut five centers to wrap in the center of the daffodil cup
For the chunky tulip necklace:
- Cut one rectangular straight pieces of each color to add a chunky core
- Cut one triangle piece of each color
- Cut two rectangular straight pieces for the red beads
For the bold azalea flower earrings:
- Cut four cone beads
- Cut four teeny cone beads in two colors
Step 3: Roll paper beads tightly around wooden skewers
Start by lining up the paper onto the skewer.
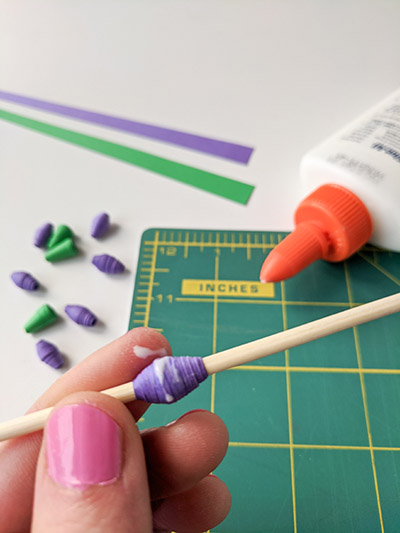
Tightly roll the strips of paper onto wooden skewers, dotting a bit of glue along the way as you roll. When you get close to the end of the paper, dot some extra white glue on the seam and thinly spread it on the bead and allow the paper beads to dry.
For cone-shaped beads: Line up the straight outside edge as you roll.
For symmetrical round beads: You’ll notice that there are faint light gray lines on my templates -- be sure to line those up as you roll to keep your paper beads even and symmetrical.
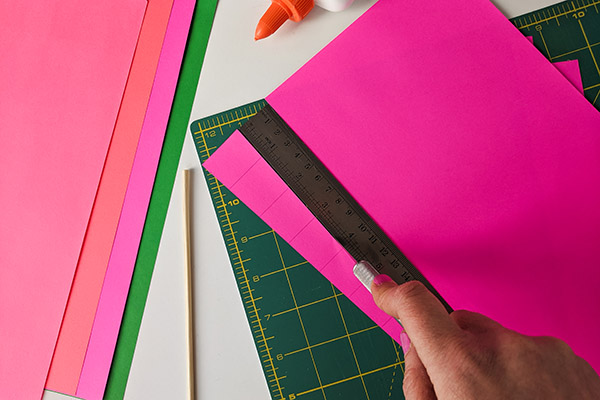
For chunky beads: roll a straight core onto the skewer first. Then layer on a triangle piece for extra bulk.
For daffodil cup beads: Roll the bead like a cone bead. Then add a second cone bead to the other side for a scalloped effect. Lastly, roll a small bead into the center for a pop of color.

Step 4: Seal paper beads
Paper beads are, well, made from paper so it’s a good idea to seal them to protect the beads. You can choose matte or glossy finish; I chose matte finish for my spring flower beads for a more realistic look. Brush white glue or decoupage onto the beads and let dry. Optionally, you may choose to spray acrylic sealer on top of dried beads to add additional protection. Alternatively, use clear nail polish for super glossy beads.
Even sealed beads should be protected from drenching spring rains, so be sure to pack that umbrella.
Step 5: String beads to make paper bead necklaces and bracelets
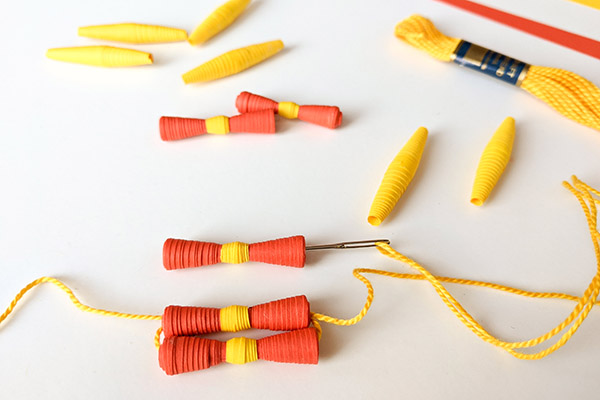
Cut a piece of embroidery thread the length of necklace that you’d like to make, or cut elastic thread for bracelets. Thread on the beads - it’s easiest to use an embroidery needle but you can also just slip it through. Tie the ends together.
Here’s how to thread the daffodil cup (corona): Slip the cording evenly through a center bead. Then slip another bead onto the thread using an embroidery needle.
Continue threading the beads by passing the left thread through to the right side, and the right side through to the left.
And now your spring-themed paper bead jewelry is ready to wear!
I hope you enjoy making your own DIY paper bead necklaces, bracelets, and earrings inspired by my favorite spring flowers. I love the creative potential in this project -- you can totally make paper bead jewelry anyway that you like. Paper bead jewelry makes a great DIY gift idea for Mother’s Day, so be sure to download my paper bead templates and start rolling your favorite colors of ASTROBRIGHTS ® Papers. Welcome, spring!
