Easy Paper Notebook for Back-To-School
BY HOLLY WADE
Club Crafted
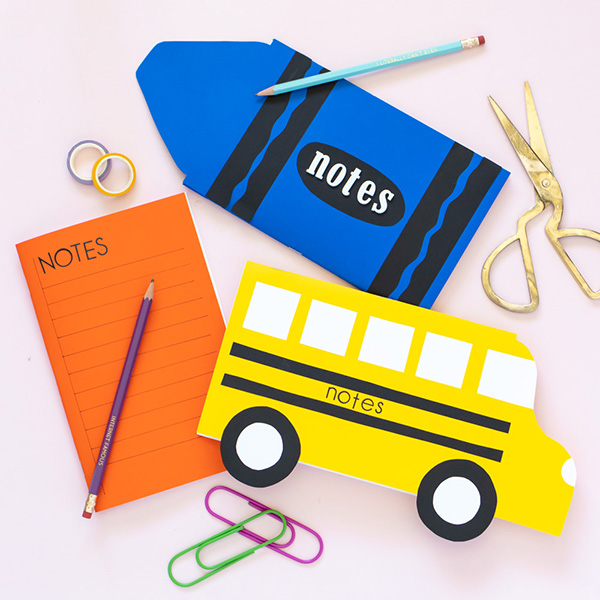
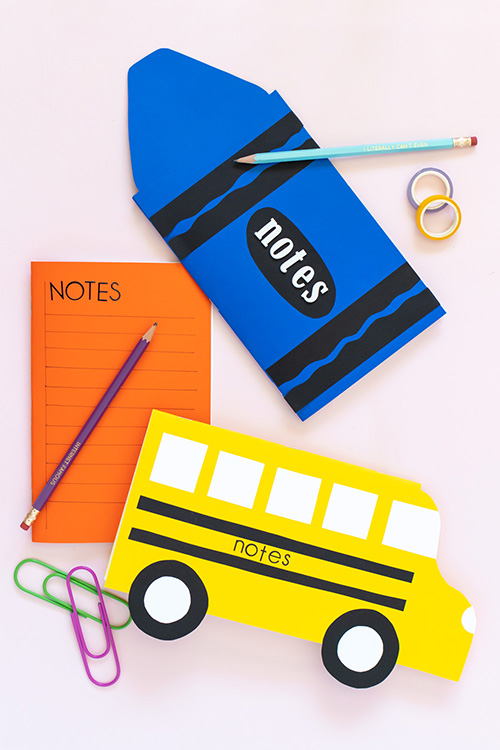
No matter how you or your kids prepare to attend school this year – in-person or online – you can still have fun preparing for back-to-school season! Make your own easy paper notebooks with a selection of ASTROBRIGHTS® Papers inspired by several well-known school references. See how to DIY a school bus notebook, crayon notebook and lined paper notebook for drawing in this semester. The ASTROBRIGHTS Papers "Primary" Color Assortment has the perfect selection of vibrant colors to making these DIY notebooks in minutes. Filled with pages of ASTROBRIGHTS Papers Premium Inkjet & Laser Paper, these notebooks will be a hit at school or at home!
Supplies:
- "Primary" Color Assortment Cardstock
- ASTROBRIGHTS Premium Inkjet & Laser Paper, Astro White
- Eclipse Black™
- Scissors
- Stapler
- Glue stick
- Alphabet stickers, black and/or white
- Black marker/pen
- Ruler
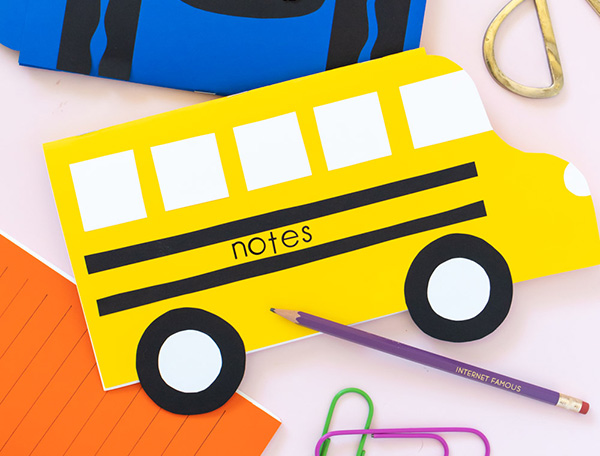
DIY SCHOOL BUS NOTEBOOK
Step 1: Select about 10 pieces of ASTROBRIGHTS Papers Premium Inkjet & Laser Paper and fold them in half. Then fold a piece of Solar Yellow™ cardstock and place it over the white papers.
Step 2: Unfold a stapler and carefully staple the middle of the fold. Then staple either side, closer to the edge of the paper. Depending on your stapler, you may need to do this with a pad underneath to protect your work surface. This is the most basic way to make a binding for easy paper notebooks.
Step 3: Place the notebook over a second piece of Solar Yellow™ cardstock. Using the notebook width as a guide, draw a shape that resembles the front of a car. Cut it out and glue it just inside the paper cover to create the shape of the school bus notebook.
Step 4: With the Eclipse Black™ paper, trace two circles and cut them out. Each should be about 2 inches in diameter.
Step 5: Then cut 1-inch circles out of the white paper. Glue them to the middle of the black circles. Then apply glue to the top-back of the "wheels" and press in place along the side of the DIY paper notebook.
Step 6: Also cut two thin strips from the long side of the Eclipse Black™ paper. Trim them as needed to span the height of the notebook. Glue the two strips just above the wheels of the school bus notebook.
Step 7: Cut small squares of white paper and glue them with spaces between to make "windows" on the bus. Make sure one is longer to be shaped for the front window of the bus.
Step 8: If desired, cut another small circle about 1/2-inch wide for the front light. Glue to the curve of the bus front and trim excess.
Step 9: Lastly, use stickers to write "Notes" in between the black lines of the bus.
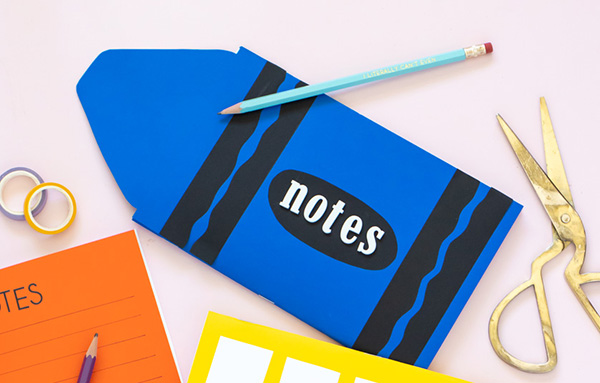
DIY CRAYON NOTEBOOK
Step 1: Select about 10 pieces of ASTROBRIGHTS Papers Premium Inkjet & Laser Paper and fold them in half. Then fold a piece of Blast-Off Blue™ cardstock (or other desired color) and place it over the white papers.
Step 2: Unfold a stapler and carefully staple the middle of the fold. Then staple either side, closer to the edge of the paper. Depending on your stapler, you may need to do this with a pad underneath to protect your work surface. This is the most basic way to make a binding for easy paper notebooks.
Step 3: With a second piece of Blast-Off Blue™ cardstock, use a ruler to draw a 1-inch-thick line. Then cut the strip. Use the width of the crayon notebook as a guide and cut to match the width.
Step 4: Then draw a large curved triangle shape on the paper and cut it out. Check the size against the notebook and trim so that it is slightly smaller than the notebook width. This will make the crayon "tip."
Step 5: Fold a piece of Eclipse Black™ paper in half. Cut a thin wavy line along one end. Then cut another one on the opposite side. Then cut them in half at the fold. Each piece should be the width of the notebook and have one wavy side and one straight side.
Step 6: Cut an oval from the remaining black paper. This will take the place of the crayon logo.
Step 7: Using a glue stick, assemble all of the pieces onto the easy paper notebook. The blue strip should go on top of the triangular tip. Then the wavy black lines go along the top and bottom with the wavy sides facing each other. Glue the oval in the middle.
Step 8: Finally, use white stickers or even a white colored pencil to write "Notes" on the crayon notebook.
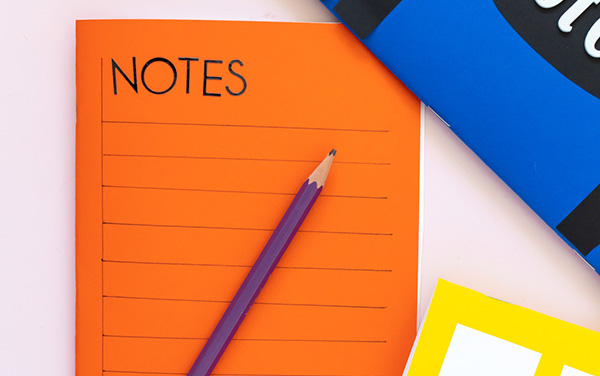
DIY LINED PAPER NOTEBOOK
Step 1: Select about 10 pieces of ASTROBRIGHTS Papers Premium Inkjet & Laser Paper and fold them in half. Then fold a piece of Orbit Orange™ cardstock (or other desired color) and place it over the white papers.
Step 2: Unfold a stapler and carefully staple the middle of the fold. Then staple either side, closer to the edge of the paper. Depending on your stapler, you may need to do this with a pad underneath to protect your work surface. This is the most basic way to make a binding for easy paper notebooks.
Step 3: Starting about 1-1/2 inches from the top of the book, draw a horizontal line. Using the ruler as a guide, draw lines all the way down the page with about 1/2-inch between each. Then draw a vertical line on the left that connects the lines.
Step 4: Lastly, use stickers or a stencil to write "Notes" at the top of the lined paper notebook.
These easy paper notebooks are fun to make for your kids (or with their help) if you're looking for an easy back-to-school craft!
.ashx?h=73&w=74&la=en&hash=646BE1CD8C7561F9D6089EEAD2F4EAFC95502D7C)
