St. Patrick's Day Lucky Rainbow Décor
.ashx?la=en)
Merriment Design
Have you ever traveled to Ireland? It’s such a beautiful country with rich culture and history. I was lucky enough (no pun intended) to explore Ireland by car with my sisters, and in addition to the lush, intensely green countryside, scenic villages and towns, and friendly locals, what I really remember are the road signs.
Irish road signs often include both the Irish and English languages. My favorite road signs were the ones on tall poles filled from top to bottom with signs pointing every which way to towns and lodging and tourist attractions.
Inspired by real Irish road signs, I designed these cute Irish road sign cupcake toppers and table centerpiece to bring some authenticity into your St. Patrick’s Day celebrations. And maybe my colorful road signs will inspire you to visit the Emerald Isle someday.
Supplies:
- Kathy’s printable Irish road signs cupcake toppers and centerpiece (PDF)
- Astrobrights Prism paper pack and Astrobrights Bright cardstock pack
- Scissors (optional: craft knife and self-healing cutting mat)
- Glue stick and tape
- Wooden coffee stir sticks
- Ceramic cake stand for cupcakes, optional
- Cardboard box from the recycling bin
We’ll be using Re-Entry Red™, Fireball Fuchsia™, Cosmic Orange™, Solar Yellow™, Martian Green™, Lunar Blue™, Celestial Blue™, Gravity Grape™. I also added some Gamma Green™ to the centerpiece base to create a lush Irish countryside.
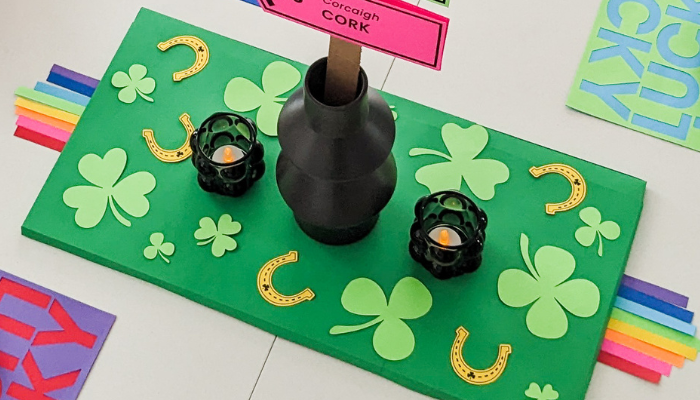
Irish road signs centerpiece
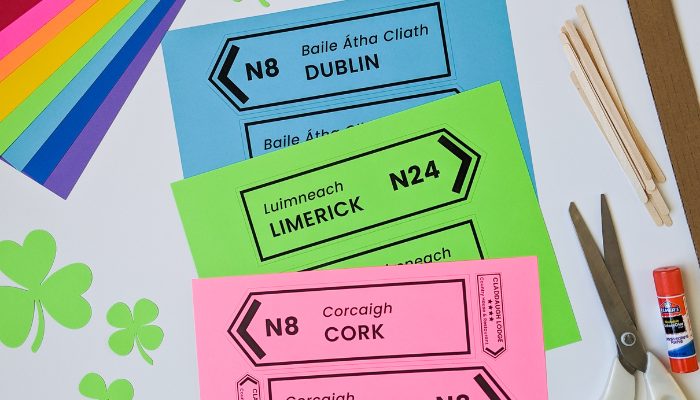
Step 1: Print and cut out my free printable Irish road signs centerpiece. Cut two signs for each town, one pointing left and one pointing right, for the front and back.
Step 2: Cut a ‘pole’ from an old cardboard box.
Step 3: Tape the road signs onto the strip of cardboard, then place inside a vase.
Step 4 (optional): Add Gamma Green paper to the base to create lush, Irish countryside. Cut out my shamrocks printable PDF and add to the base. If you’d like to also add the horseshoes, you can get that template as part of my Lucky Rainbows Décor project at Astrobrights.com.
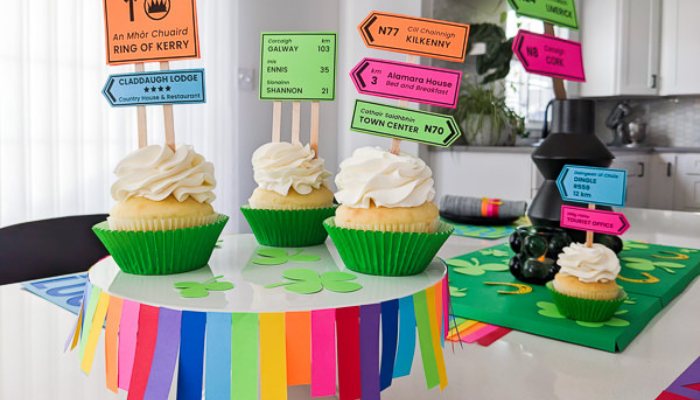
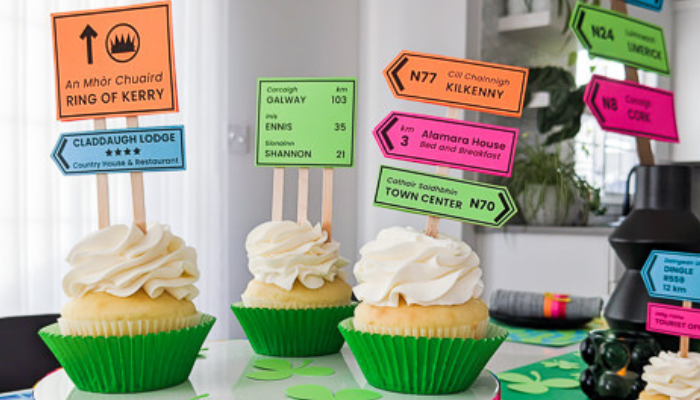
Irish road signs cupcake toppers
Step 1: Print and cut out my free printable Irish road signs cupcake toppers. Cut two signs for each topper, one pointing left and one pointing right, for the front and back.
Step 2: Tape the road signs to a wooden coffee stir stick. Layer them together as you wish.
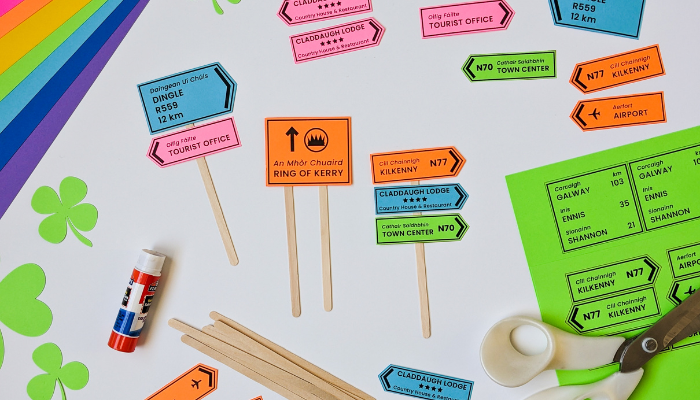
Step 3: Flip the cupcake topper over and tape or glue the backs.
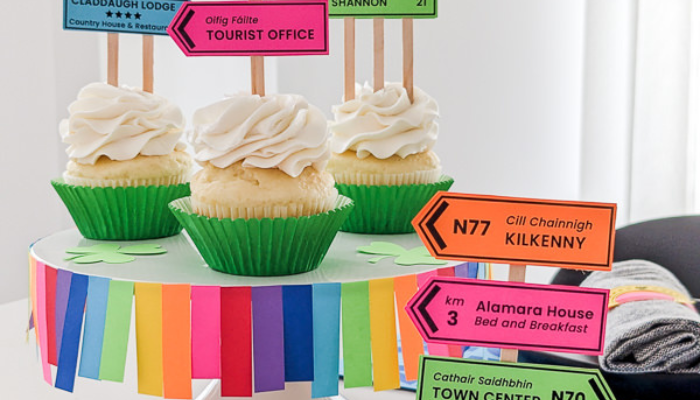
Step 4: Slip the cupcake toppers into cupcakes and put into the rainbow cake stand (see tutorial below).
Rainbow cake stand
Step 1: Cut strips of paper using scissors or alternatively, use your craft knife, metal ruler and self-healing mat. Mine were ½” wide x 8-½”. I used Re-Entry Red, Fireball Fuschia, Cosmic Orange, Solar Yellow, Martian Green, Lunar Blue, Celestial Blue, and Gravity Grape.
Step 2: Be sure to check your glue stick label to confirm it’s non-toxic like mine. Put some glue stick to the outer edge of your ceramic cake stand. Cut a strip of paper any height you like, then attach it to the cake stand.
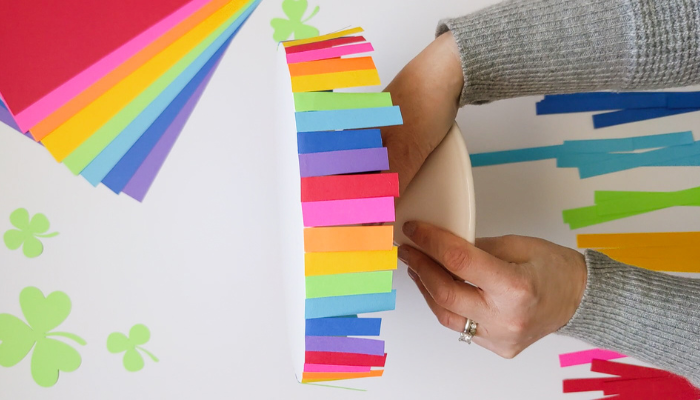
Step 3: Repeat until your stand is covered. Let dry.
Step 4: When St. Patrick’s Day is over, just pull off all the paper and soak the cake stand in water to remove the glue stick.
Be sure to also check out my coordinating Lucky Rainbows Décor project at Astrobrights.com. These two St. Patrick’s Day paper projects look even better together. Sláinte to Ireland!
Kathy Beymer
Instagram: @kathybeymer
Pinterest: @merrimentdesign