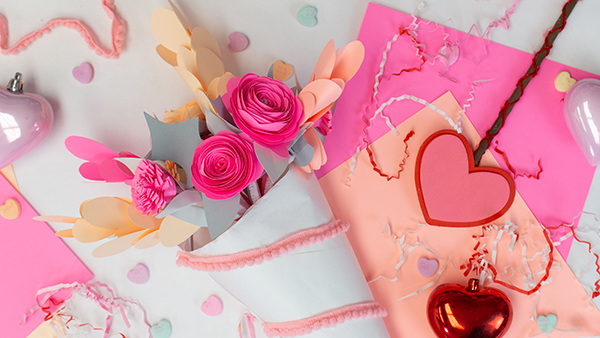
DIY Valentine's Day Paper Bouquet

Craft Box Girls
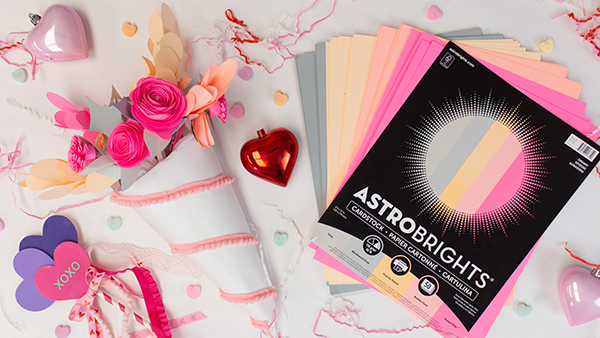
I love making paper flowers and showing how easy it can be to create your own at home. Valentine’s day is the perfect time to create your first bouquet of flowers using the Astrobrights® Dreamy Cardstock Pack. This is one of my favorite color combinations from Astrobrights Papers. It is so dreamy, bright and I love that it is double sided, making it the perfect choice for Valentine’s Day or a Spring flowers.
No fancy cutting machine required. I typically free-hand cut my petals and leaves but I created templates to make it easy for you to make your own at home.
Materials:
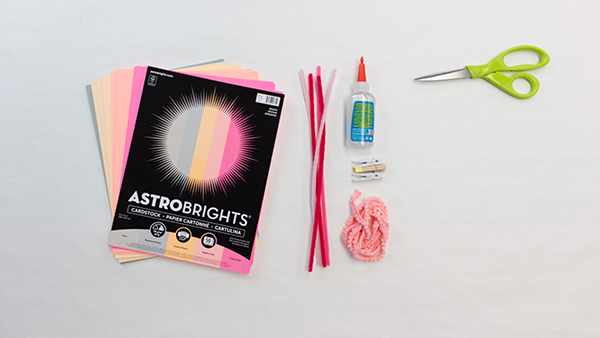
- Astrobrights® Dreamy Cardstock Paper Pack
- Pipe Cleaners
- Paper Glue
- Astrobrights® Dreamy Cardstock Paper Pack
- Scissors
- White or Brown Craft/ Butcher Paper
- Ribbon or Trim
- Pencil
- Clothes Pins
How to Make A Valentine's Day Paper Flower Bouquet
Scallop Spiral Rose Flower:
- Take a sheet of cardstock from the pack. You can download my template, cut and trace the spiral scallops on the cardstock or you can draw your own spiral scallop and cut along those lines or you can free hand cut it.
- Once the spiral is cut, start at the outside end and roll the flower inward. To help keep the flower secure while rolling place your index finger at the top of the flower roll and your thumb at the bottom. Use your other hand to roll.
- Once you get to the end determine if you like how tight the flower is. If you want it to be a little bigger let it unravel slightly.
- Place a lot of paper glue on the end tab of the flower and glue it to the bottom. Hold it in place using a clothespin to secure until dry.
- Once the flower is dry, curl the end of a pipe cleaner. Place glue on the curled end and glue to the bottom of the flower. Hold in place until dry.
Spiral Rose Flower:
- Take a sheet of cardstock from the pack. You can download my template, cut and trace the spiral on the cardstock or you can draw your own spiral scallop and cut along those lines or you can free hand cut it.
- Once the spiral is cut, start at the outside end and roll the flower inward. To help keep the flower secure while rolling place your index finger at the top of the flower roll and your thumb at the bottom. Use your other hand to roll.
- Once you get to the end determine if you like how tight the flower is. If you want it to be a little bigger let it unravel slightly.
- Place a lot of paper glue on the end tab of the flower and glue it to the bottom. Hold it in place using a clothespin to secure until dry.
- Once the flower is dry, curl the end of a pipe cleaner. Place glue on the curled head and glue to the bottom of the flower. Hold in place until dry.
Wisteria Flower:
- Take a sheet of cardstock from the pack. You can download my template, cut and trace the petals on the sheet or you can draw your own “lopsided hearts”. Cut 5-8 petals depending on how long you want to make your wisteria flower.
- Slightly fold each petal down the center.
- Place a small line of glue on the tab of the flower and glue at the top of a pipe cleaner. Continue gluing the petals down the pipe cleaner overlapping each petal.
Pixie Flower
- Starting on the 11” side of a piece of cardstock cut 2 strips that are about 2” wide. You can vary the width of the strip. Make sure both strips are the same width. I created a template for you to download and trace if needed.
- Fold each strip in half. Cut slits on the folded side. Make sure to not cut all the way through.
- Place a dot of glue at the end of the strip and glue a pipe cleaner to the end.
- Roll the strip around the pipe cleaner. Once you reach the end of the first paper strip, add a dot of glue and attach the second strip and roll. At the end place a dot glue to secure.
- Once the flower is dry use your finger to fluff out the petals.
Make multiples of each flower in various colors.
Leaves:
- Download and cut out the leaf templates I created or free-hand cut the leaves.
- I traced my leaves on the Gray and Weathered Gray Paper from the Dreamy Pack. I love the contrast of using a non-traditional colored leaf.
- Fold each leaf in half to give it dimension.
- Cut a small slit at the end of each leaf.
- Glue the leaves around the pipe cleaner stems on each flower. The slit will have the leaves fit around the pipe cleaners and naturally lean into the flower.
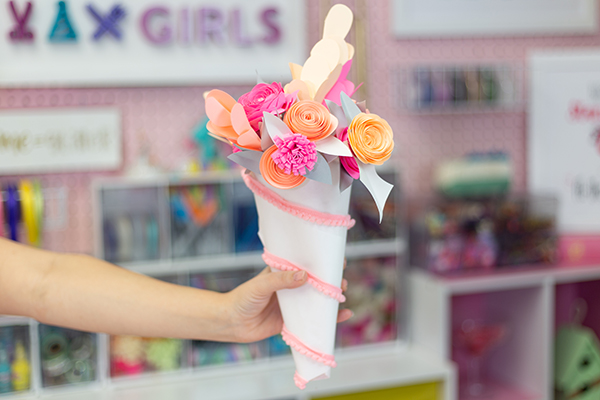
Once you have made all the flowers and attached the leaves arrange a bouquet. Hold the stems together and wrap an extra pipe cleaner around the stems to hold them in place.
Bouquet Wrapper
- Roll a piece of craft or butcher paper into a cone and secure with glue. You want to make sure the cone is large enough for the flowers bouquet.
- To add a decorative touch, glue a piece of ribbon or trim around the cone.
- Insert the bouquet
I love how these flowers turned out! They are perfect to gift to give to a friend or to yourself! I think these ones are going to have a permanent spot in my craft room!
Happy Valentine’s Day
xoxo-Lynn Lilly, @craftboxgirls