Mischievous Monsters DIY Halloween Decorations

.ashx?la=en)
Merriment Design
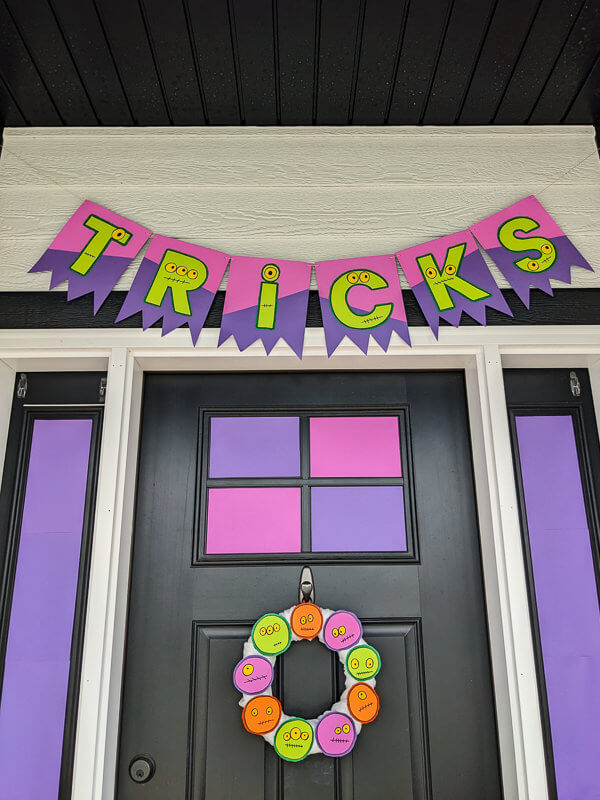
Make my monstrously cute Halloween decorations for your front porch, classroom, or Halloween party! My family-friendly monster decorations are perfect for kids who prefer funny over frightening.
ASTROBRIGHTS® Papers asked me to design a colorful Halloween craft project. Our neighborhood is filled with young children, so I wanted to create an adorably spooky front porch that wouldn’t scare away little trick-or-treaters.
I hand-drew all the monsters for maximum personality. You can print and cut my monsters or print my blank template instead for kids to draw their own creatures with black markers. Follow my paper color scheme or create your own Halloween palette. I chose the bold autumn colors in the ASTRODESIGNS Fall Assortment Pack and added Cosmic Orange™ and Solar Yellow™ for Halloween.
Add my cheeky TRICKS banner, monster plant picks, and haunted candy bowl to complete the front porch mayhem. Eek!! The monsters are here!
Supplies:
- ASTROBRIGHTS® card stock paper in Cosmic Orange™, Orbit Orange™, Outrageous Orchid™, Gravity Grape™, Terra Green™, Gamma Green™ and Solar Yellow™ -- I used the ASTRODESIGNS Fall and ASTRODESIGNS Delightful assortment packs
-
12" wreath form or larger
-
Cheesecloth fabric
-
Black markers - one thin, one thick
-
Scissors
-
Glue stick and clear tape
-
Small piece of grosgrain ribbon to hang the wreath
-
Long push pins or glue gun
-
Hole punch and baker’s twine to hang the banner
-
Pipe cleaners to make floral picks for mums
How to make my Monster Wreath
Step 1: Print and cut out paper monsters
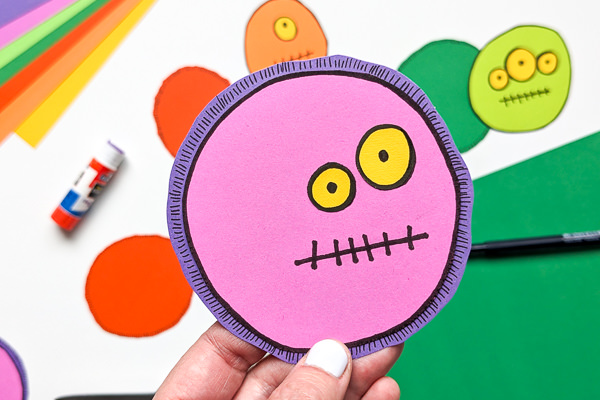
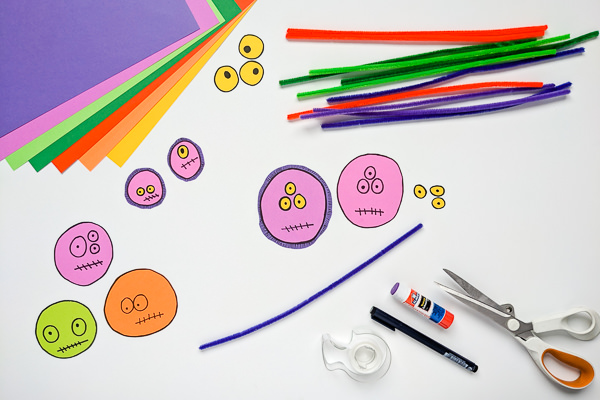
Print and cut my monsters faces from Cosmic Orange, Terra Green, and Outrageous Orchid. If you’d like to draw your own monsters, just print my blank template and draw faces with a thick black marker.
Step 2: Add yellow eyes to your monsters
Print the same templates onto Solar Yellow paper. Cut out the eyes and glue to the monsters. If you drew your own monsters, then draw your own eyes, too.
Step 3: Add fuzzy fur to your monsters
Make your monsters look fuzzy! Place monsters on top of Orbit Orange, Gravity Grape, and Terra Green cardstock paper and draw lots of furry lines with a thin black marker. Roughly cut out the fuzzy fur and glue on the backs of the monsters.
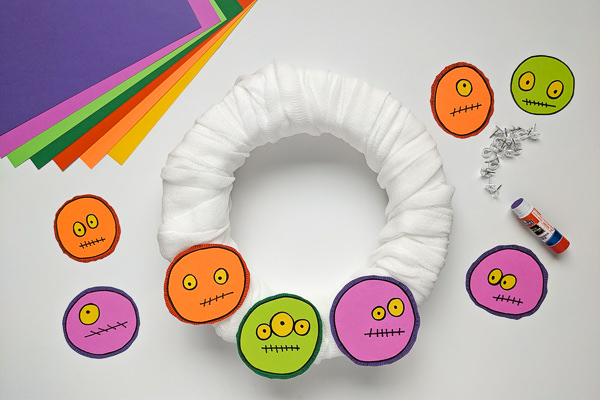
Step 4: Wrap wreath form with strips of white cheesecloth
Wrap cheesecloth around your wreath form and secure with long push pins or straight pins.
Step 5: Add monsters to your wreath
You can add monsters to your wreath in two different ways: I glued long push pins to the backs of my monsters so that I could move them around. Let the glue dry and push the pins into the wreath form. Or for a more permanent solution, use a glue gun to adhere the monsters to the wreath.
Step 6: Add a hanger and hang
Cut a piece of grosgrain ribbon and fold it in half into a loop. Use push pins or straight pins to attach the ribbon to the back of the wreath and hang.
How to decorate mums with my monster plant picks
Step 1: Assemble monster faces as described as above
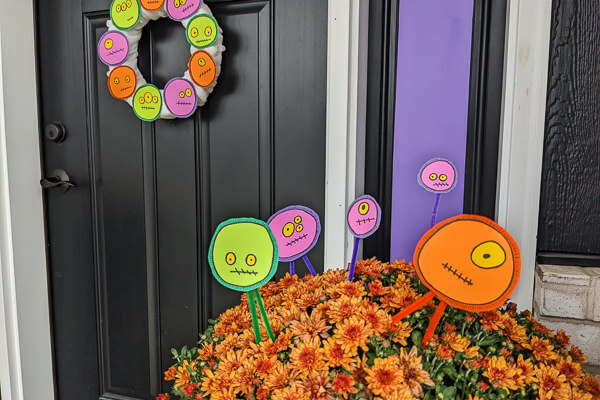
Follow steps 1-3 from the monster wreath instructions to create monster faces for floral picks.
Step 2: Tape monsters onto pipe cleaners or wooden dowels
I used two pipe cleaners for larger monsters and one pipe cleaner for the teeny ones.
Step 3: Add plant picks to potted mums or plants
Stick the pipe cleaner into the mums.
How to make my candy bowl with eyes
Step 1: Cut out eyes
Cut out eyes and tape to a pipe cleaner. Cut duplicate eyes and glue them to the backs to make reversible eyes.
Step 2: Tape pipe cleaners to the bowl
Bend the pipe cleaners to create a small circle on the bottom end. Then tape the circles to the bottom of a ceramic bowl to ensure it stays put for step 3.
Step 3: Fill with lots of candy!
You can make several haunted candy bowls with different types of candy if you like.
How to make my TRICKS monster banner
Step 1: Print and cut out letters
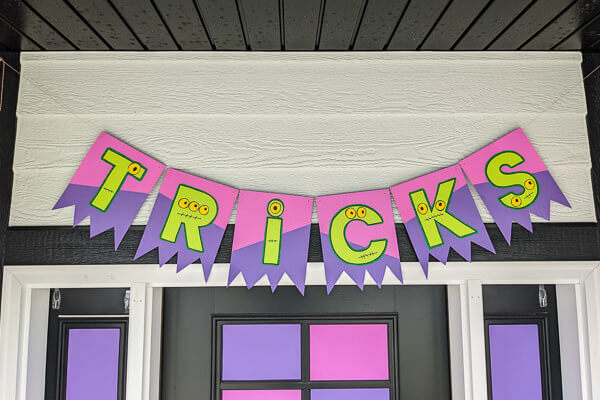
Print the letters onto Terra Green cardstock and cut them out. Add Solar Yellow eyes as described above.
Step 2: Add fuzzy fur round each letter
Put the letters on top of Terra Green cardstock paper and draw lots of furry lines around them with a thin black marker. Roughly cut out the fuzzy fur and glue on the back of the letter.
Step 3: Create bunting
Cut the bottom edges of five pieces of letter-sized Gravity Grape cardstock paper to look like it’s been ripped by monsters. Then glue polygons of Outrageous Orchid on top to create mysterious purple bunting.
Step 4: Glue letters to the bunting
Glue each letter to the bunting and let dry.
Step 5: Hang your banner
Punch holes, string, and hang for maximum monster mayhem!
.ashx?la=en)
Be sure to see my other paper crafts for Astrobrights including my Gingerbread Pals in Ugly Sweaters, Camping Playset, 3D Shells, Dinosaur Birthday Party, Smores Campfire Playset, Jokes Valentines, and many more. Happy Halloween!
Kathy Beymer
Instagram: @kathybeymer
Pinterest: @merrimentdesign
.ashx?la=en)
.ashx?la=en)
.ashx?la=en)
.ashx?la=en)
.ashx?la=en)
.ashx?la=en)
.ashx?la=en)
.ashx?la=en)
.ashx?la=en)
.ashx?la=en)
.ashx?la=en)
